DIY Vintage Photo Album Guestbook
There are a lot of experiences you may consider leaving out of your wedding day but please, make sure the guestbook isn't one of them! It's such a great opportunity to create a unique and personalized memento of your big day, and something look back on over the years. For our wedding this past September, I created this Vintage Photo Album Guestbook as a way to collect heartfelt messages and snapshots of everyone at the wedding (including the bride and groom!).
Things you will need:
vintage photo album
construction paper/cardstock
polaroid camera with film
photo corners
pens/chalk pens
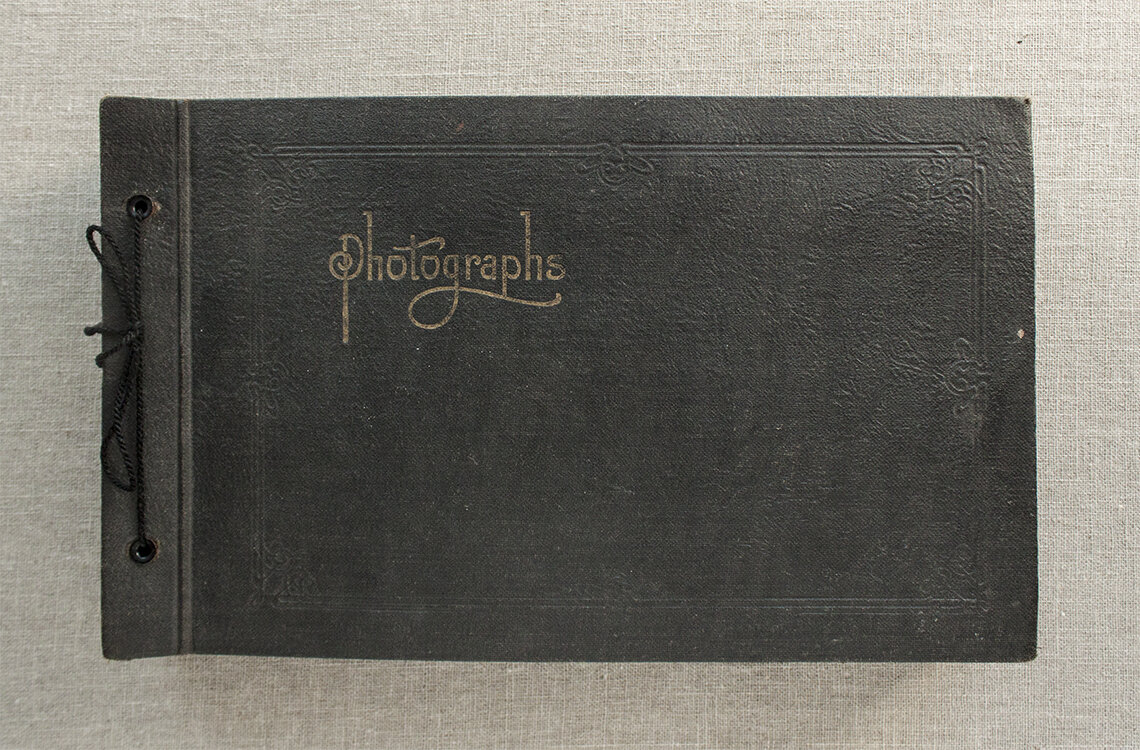
The first item is definitely going to be the trickiest to pull off. I bought two vintage photo albums at separate local antique shows and found plenty more after several trips. The key is to keep digging. You'll want an album that either has plenty of blank pages or has the hardware to add/remove pages. In this case, I used the interior blank pages from one album and wrapped them in the cover of a second album with a more appealing exterior. Most of the time these photo albums are filled with creepy old photos from the early 20th century but we can fix that.
Once you've found the perfect album, fill it with construction paper or cardstock that complements its exterior. You can use the old pages as a guide for trimming the new pages. The best part about this is that you can fill the album with as many pages as you think you'll need (add a couple extra just in case - they can be removed later!).

The next step is choosing a camera. I bought a Fujifilm Instax Mini 8 Instant Camera in Edgy Black with a boatload of film on Amazon. I've seen the same cameras in every colour at Michaels as well. Urban Outfitters now has a variety of really cool vintage replica polaroids too (if you're budget is a little higher). Once you've got your camera and film, take a test shot - you'll need this first polaroid as a guide.
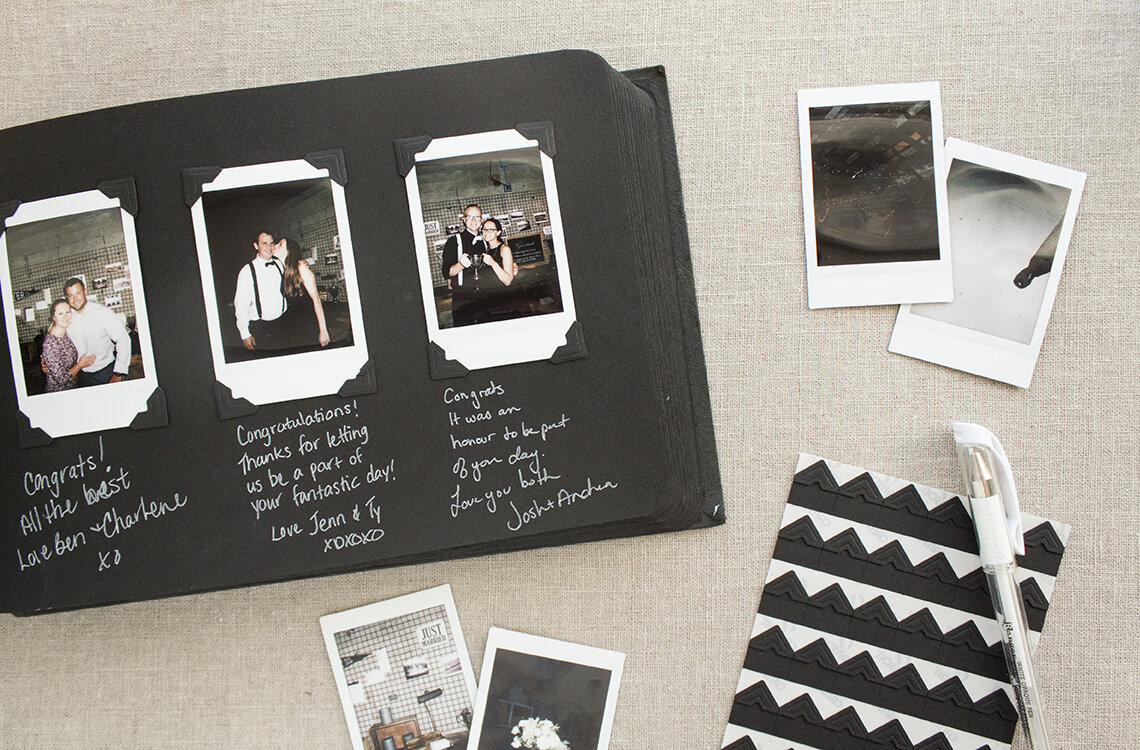
I decided to create the layout for the interior pages prior to the wedding. It made it easier for our guests to interact and kept the pages consistent. Take four photo corners and, rather spending time meticulously measuring, place them on the corners of your polaroid. Carefully stick the polaroid to the page, pressing all the corners down, and remove the polaroid. Now you know that the polaroid will fit in the photo corners with wiggle room - guests don't want to be fidgeting with photo corners that are too exact! Repeat as many times as will fit on the page, making sure to leave room for a messages section beside or below each (optional).


Finally, grab some white chalk pens or ball point black pens, depending on the colour of your paper, and lay everything out on the table. This process may not be as intuitive as it seems so make sure to include a sign with instructions. Don't forget to have the extra film on hand for refills (they will happen often).
Note: Add a couple of our Vintage Cameras to fill out the table and really hit home that vintage photography experience.
I couldn't be more happy with the result. Not only did the majority of guests participate, but they had a lot of fun with it (we even got more than a few selfie photoshoots). It was pretty fun going through the pages the day after the wedding - I really had no clue what to expect. A huge thank you to our family and friends - this guestbook would be empty without you!